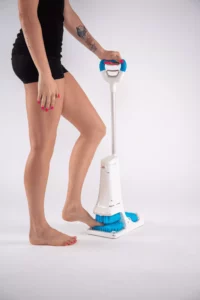
In the world of home improvement and personal hygiene, installing a standing shower foot scrubber is a simple task that can greatly enhance your shower experience. This device, typically made of plastic or rubber material with bristles, allows you to clean and exfoliate your feet without having to bend over or sit down. This practical tool not only contributes to personal cleanliness but also promotes better balance and safety within the shower. However, many individuals are unsure about how to properly install this beneficial gadget. This article will guide you through the process, providing step-by-step instructions and tips to ensure a successful installation.
The first section of this article will outline the essential tools and materials needed for the installation. It’s vital to ensure you have everything you need before beginning, to prevent any unnecessary interruptions or delays. The second part will discuss pre-installation preparation steps. Proper preparation is key to a smooth installation process and ensures that the foot scrubber is fitted securely and correctly.
Next, we’ll delve into the installation process of a standing shower foot scrubber. This step-by-step guide will provide detailed instructions to help you navigate the process with ease. Following that, safety measures during installation will be addressed. As with any DIY project, safety is paramount, and understanding the potential risks can help prevent any accidents or injuries.
Lastly, we will discuss the maintenance and care of a standing shower foot scrubber. While these devices are typically designed for durability, proper care can further extend their lifespan and ensure they remain effective. This section will provide tips on cleaning and maintaining your foot scrubber to keep it in top condition. By the end of this article, you will have a comprehensive understanding of how to install and care for your standing shower foot scrubber.
Essential Tools and Materials Needed for Installation
When installing a standing shower foot scrubber, it’s important to have all the essential tools and materials on hand to make the process as smooth as possible. This typically includes the foot scrubber itself, a suitable adhesive or mounting solution, and potentially some basic hand tools depending on the specific model of foot scrubber.
Many foot scrubbers are designed to be easily attached to the floor of your shower via suction cups or adhesive pads. These are generally included with the foot scrubber, but it’s always a good idea to double-check before starting the installation process. Some models may require a more permanent installation using screws or other mounting hardware. In this case, you may also need a drill, appropriate drill bits, and a screwdriver.
It’s also essential to have the correct cleaning materials on hand. This could include a mild detergent or cleaning solution and a soft cloth. These are used to ensure the installation area is clean and free of soap residue or grime before installing the foot scrubber. This helps ensure a secure attachment and prolongs the life of the adhesive.
In conclusion, the essential tools and materials needed for the installation of a standing shower foot scrubber can vary based on the specific model, but generally include the foot scrubber, an adhesive or mounting solution, and potentially some basic hand tools. Proper cleaning materials are also important to prepare the installation area.
Pre-Installation Preparation Steps
The process of installing a standing shower foot scrubber begins with the pre-installation preparation steps. This is a crucial stage that sets the stage for the rest of the installation process. The primary aim of the pre-installation preparation steps is to ensure the area where the foot scrubber will be installed is ready and appropriate for the task.
Firstly, the shower area needs to be clean and dry. This will make the installation process easier and also reduce the risk of slipping or falling during the process. If the area is damp or dirty, it may affect the effectiveness of the adhesive used to hold the foot scrubber in place.
Next, you need to decide on the exact spot where you want the foot scrubber to be placed. This is often at a comfortable height where the user can easily reach their foot. Not too high that it becomes uncomfortable to use, and not too low that it doesn’t provide the necessary leverage for a good scrub.
After deciding on the spot, you may want to mark it using a washable marker. This will guide you during the installation process, ensuring that the foot scrubber is placed exactly where you want it to be.
In conclusion, the pre-installation preparation steps are an essential part of the installation process of a standing shower foot scrubber. They ensure that the area is ready for installation and that the foot scrubber is placed in the most convenient and effective spot.
Installation Process of a Standing Shower Foot Scrubber
The installation process of a standing shower foot scrubber is a straightforward task that can be completed within a short time frame. First, it’s essential to choose an appropriate location in your shower for the scrubber. This location should be easily accessible and should support the weight of the device and the foot of the user.
Once a suitable location has been identified, the next step is to clean the area thoroughly. This is to ensure that the adhesive on the base of the foot scrubber adheres properly to the shower floor. Use a non-abrasive cleaning agent to clean the area, and let it dry completely before proceeding with the installation.
After the area is clean and dry, remove the protective backing from the adhesive on the foot scrubber. Place the foot scrubber in the chosen location and press firmly. It’s important to apply pressure evenly to ensure that the entire base adheres to the shower floor.
Many foot scrubbers also come with suction cups for added stability. If your scrubber has these, press each suction cup down firmly to create a vacuum seal. This will help keep the foot scrubber secure during use.
Allow the adhesive to set for the recommended amount of time before using the foot scrubber. This will ensure that the scrubber is firmly attached and won’t move during use.
Installing a standing shower foot scrubber is a simple way to enhance your shower experience. It not only provides a means to clean and exfoliate your feet but also adds an element of safety by preventing slips and falls. By following these easy installation steps, you can enjoy the benefits of a foot scrubber in your shower in no time.
Safety Measures During Installation
Safety Measures During Installation is a crucial subtopic when discussing the installation of a standing shower foot scrubber. This aspect is significant as it ensures the protection of the individual involved in the installation process, and it also guarantees the longevity and efficiency of the foot scrubber.
The first safety measure to consider is to ensure that the shower area is dry before beginning the installation to avoid slipping incidents. Since the operation involves tools that could cause harm, it’s important to handle them with care, keeping them out of reach of children.
Another important safety measure is wearing suitable protective gear. This includes gloves to protect your hands, goggles to safeguard your eyes from small particles or debris, and even knee pads if the installation requires extended periods of kneeling.
Electrical safety is also key, especially considering that showers are wet areas. It is paramount to ensure that any nearby outlets are adequately covered and that the use of any electrical equipment is done with caution.
Lastly, it’s always good to have a first-aid kit close by in case of any minor accidents. It’s also recommended to have someone else at home during the installation, not only to lend a hand if needed but also to provide assistance in case of an emergency.
In conclusion, safety should never be overlooked during any form of installation, including that of a standing shower foot scrubber. It protects the installer and ensures the proper functioning and durability of the product.
Maintenance and Care of a Standing Shower Foot Scrubber
Maintenance and care of a standing shower foot scrubber are crucial to ensure its longevity and optimal functionality. Like any other bathroom accessory, a standing shower foot scrubber needs regular cleaning and inspection. Over time, soap, shampoo, and other substances can accumulate on the scrubber, which may not only affect its performance but also make it a breeding ground for bacteria and mold. Therefore, regular cleaning using a mild detergent and a soft brush is recommended.
The scrubber’s bristles also need attention. Depending on the frequency of use, the bristles may wear out over time and will need to be replaced. Most manufacturers provide guidelines on how often you should replace the bristles or the entire foot scrubber. It is important to follow these guidelines to maintain the scrubber’s effectiveness.
In addition to cleaning and replacing worn-out parts, you should also inspect the scrubber regularly for any signs of damage. This could include cracks in the plastic or metal parts, loose or missing bristles, or issues with the suction cups that keep the scrubber in place. If you notice any such issues, it is best to repair or replace the scrubber as soon as possible to prevent any potential accidents.
In conclusion, the maintenance and care of a standing shower foot scrubber involve regular cleaning, replacing worn-out parts, and conducting routine inspections for damage. By following these steps, you can ensure that your shower foot scrubber remains in top condition and continues to provide a safe and effective way to clean and exfoliate your feet.


