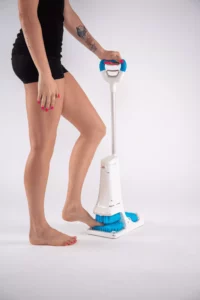
Installing a standing shower foot scrubber can greatly enhance your showering experience, providing both convenience and improved foot hygiene. The process of installing this handy device is straightforward, but it requires careful attention to detail to ensure it remains securely in place and functions effectively. This article will guide you through the essential steps of installing a standing shower foot scrubber, covering everything from selection to maintenance.
The first step is selecting the appropriate foot scrubber that best suits your needs and shower setup. With various designs and materials available, choosing the right one can make a significant difference in both comfort and durability. Next, you’ll need to prepare the shower floor surface to ensure it is clean and free of any residue that could interfere with the scrubber’s adhesion. Proper preparation is crucial for a secure installation.
Once the shower floor is ready, the positioning and placement of the foot scrubber come into play. Correct placement not only ensures maximum usability but also prevents potential slipping hazards. After positioning, securing the foot scrubber to the shower floor is the next critical step. This may involve using suction cups, adhesive strips, or other securing mechanisms, depending on the scrubber’s design.
Finally, maintaining and cleaning the foot scrubber is essential to prolong its lifespan and keep it hygien
Selecting the Appropriate Foot Scrubber
Selecting the appropriate foot scrubber is a crucial initial step in installing a standing shower foot scrubber. The right choice can significantly impact the effectiveness, comfort, and durability of the scrubber, ensuring a better user experience. When selecting a foot scrubber, consider factors such as the material, size, and design. Foot scrubbers come in various materials, including rubber, silicone, and pumice, each offering different levels of firmness and texture. Silicone scrubbers, for instance, are known for their flexibility and gentle exfoliating properties, making them ideal for sensitive skin. Rubber scrubbers, on the other hand, provide a sturdier and more durable option.
The size of the foot scrubber is another essential consideration. It should be large enough to accommodate different foot sizes but not so large that it becomes cumbersome or difficult to position in the shower. Some scrubbers come with additional features like built-in suction cups or non-slip bases, which help keep the scrubber securely in place during use. It’s also important to look for a scrubber that is easy to clean and resistant to mold and mildew, ensuring hygienic use over time.
Lastly, consider the design and functionality of the foot
Preparing the Shower Floor Surface
Preparing the shower floor surface is a crucial step in the installation of a standing shower foot scrubber. This preparation ensures that the scrubber adheres properly and remains securely in place during use, which is essential for both functionality and safety. The process typically begins with a thorough cleaning of the shower floor to remove any soap scum, mildew, or other residues. Utilizing a non-abrasive cleaner that is strong enough to break down grime without damaging the surface is recommended. The goal is to achieve a completely clean and dry surface, as any leftover moisture or debris can compromise the adhesive or suction mechanisms used to secure the foot scrubber.
Once the shower floor is clean, it is important to dry the surface completely. Any residual moisture can interfere with the adhesion process, leading to a less secure attachment. Using a towel or cloth to dry the area, followed by allowing it to air dry, can ensure that the surface is adequately prepared. In some cases, especially on textured or porous surfaces, it might be necessary to use an alcohol-based solution to remove any remaining oils or residues that could hinder adhesion. This additional step can be particularly beneficial in ensuring a long-lasting bond between the foot scrubber
Positioning and Placement of the Foot Scrubber
The positioning and placement of the foot scrubber are crucial for ensuring both safety and effectiveness. A well-placed foot scrubber can provide a more comfortable and thorough cleaning experience while minimizing the risk of slipping and falling. Start by identifying a flat, stable area on the shower floor where the scrubber can be securely placed. Ideally, this spot should be easily accessible and allow for natural foot movement without causing strain. A common recommendation is to position the scrubber near the center of the shower floor, where you can easily reach it without having to adjust your stance too much.
When determining the exact placement, consider the layout of your shower and the flow of water. Position the scrubber in a location where water can easily rinse away the soap and debris without flooding the scrubber or creating a slippery surface around it. Additionally, avoid placing the scrubber too close to the shower drain, as this could obstruct drainage and create buildup. For showers with a sloped floor, test different areas to ensure the scrubber remains stable and does not shift during use.
Once you have identified the optimal placement, mark the area if necessary to serve as a guide during installation. This step will
Securing the Foot Scrubber to the Shower Floor
Securing the foot scrubber to the shower floor is a crucial step to ensure it remains in place during use and provides a safe, slip-free experience. This process often involves using suction cups or adhesive strips, which are common features in many foot scrubbers designed for showers. Before securing the foot scrubber, it’s important to thoroughly clean and dry the area of the shower floor where the scrubber will be placed. Any residue, soap scum, or moisture can affect the effectiveness of the suction or adhesive, potentially causing the scrubber to shift or come loose.
If the foot scrubber uses suction cups, position the scrubber on the shower floor and press down firmly on each suction cup to create a strong seal. It’s beneficial to start from one side and work your way to the other, ensuring each cup is securely attached. If the scrubber uses adhesive strips, peel off the protective backing and press the scrubber firmly into place, holding it for a few seconds to ensure a good bond. Some scrubbers might also come with additional securing mechanisms, such as screws or brackets, which can be used for an extra level of stability, especially in high-traffic
Maintenance and Cleaning of the Foot Scrubber
Regular maintenance and cleaning of a standing shower foot scrubber are essential to ensure both its longevity and effectiveness. Over time, soap scum, dead skin cells, and other debris can accumulate on the scrubber’s surface, diminishing its scrubbing capabilities and potentially harboring bacteria. To maintain optimal hygiene, it is recommended to rinse the scrubber thoroughly with warm water after each use. This helps to remove any immediate residues and prevents buildup.
In addition to daily rinsing, a more thorough cleaning should be performed weekly or bi-weekly, depending on usage. This involves removing the foot scrubber from the shower floor if it is not permanently affixed. Use a mild detergent or a mixture of vinegar and water to scrub the surface of the foot scrubber. A soft brush can be effective in getting into any grooves or textured areas. Ensure that all soap residues are washed away, and allow the scrubber to air dry completely before reattaching it to the shower floor.
It’s also important to inspect the foot scrubber regularly for any signs of wear and tear. Over time, the bristles or scrub pads may become worn out and less effective. If this occurs, consider replacing


